Post your first job
Candio’s job wizard has five steps: Role · Form · Automation · Scorecards · Publish. Each step auto-saves; you can click Save & exit at any time and come back via Jobs → the job → Edit wizard. The right-hand Live Preview panel updates as you fill the form so you see what candidates will see on your careers page.
Open the wizard with the big green + New job button in the sidebar.
Step 1 — Role
Section titled “Step 1 — Role”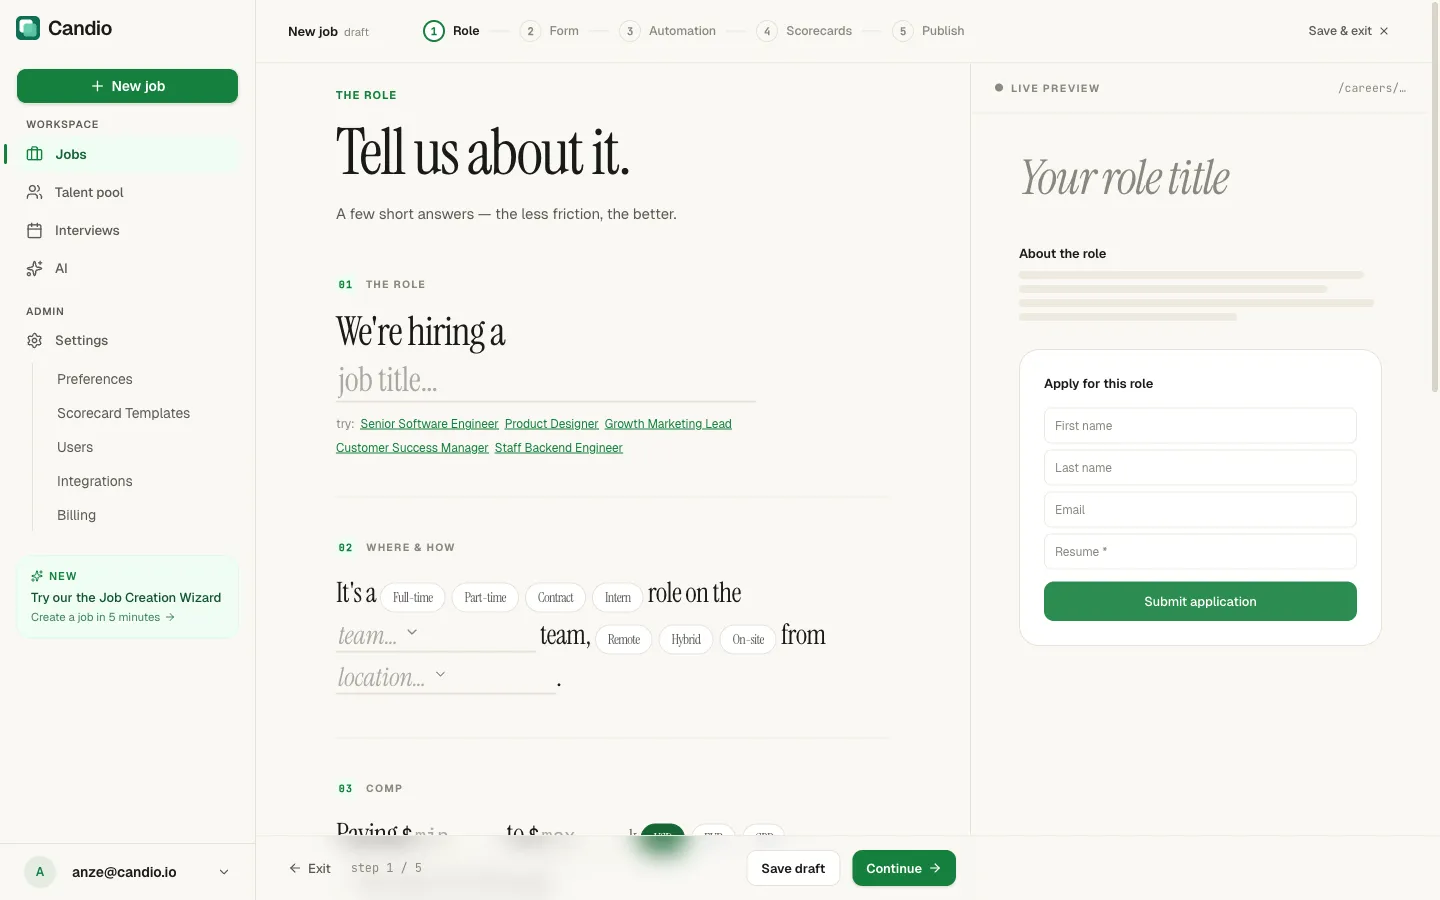
“Tell us about it. A few short answers — the less friction, the better.”
Five numbered sections:
01 The role
Section titled “01 The role”Type the job title under “We’re hiring a …”, or tap a quick-pick below: Senior Software Engineer · Product Designer · Growth Marketing Lead · Customer Success Manager · Staff Backend Engineer. The title you type becomes the role’s public headline.
02 Where & how
Section titled “02 Where & how”- Employment type — Full-time / Part-time / Contract / Intern.
- Team (department) — from the list managed under Settings → Preferences → Departments.
- Work mode — Remote / Hybrid / On-site.
- Location — one of your offices, managed under Settings → Preferences → Offices.
03 Comp
Section titled “03 Comp”- Paying $min to $max k — pay range in thousands.
100–180means $100k–$180k. - Currency — USD / EUR / GBP.
- Show salary on the careers page — unchecked by default. When on, candidates see the range.
04 Hiring manager
Section titled “04 Hiring manager”Avatar chips for every active user in your workspace. Pick one. The hiring manager gets email notifications on every new applicant and acts as the scorecard-request default owner.
05 Details
Section titled “05 Details”Rich-text editors for About the role and Requirements. This is the body of the public job post — keep it honest and concise. Toolbar supports bold, italic, lists, and links.
Step 2 — Form
Section titled “Step 2 — Form”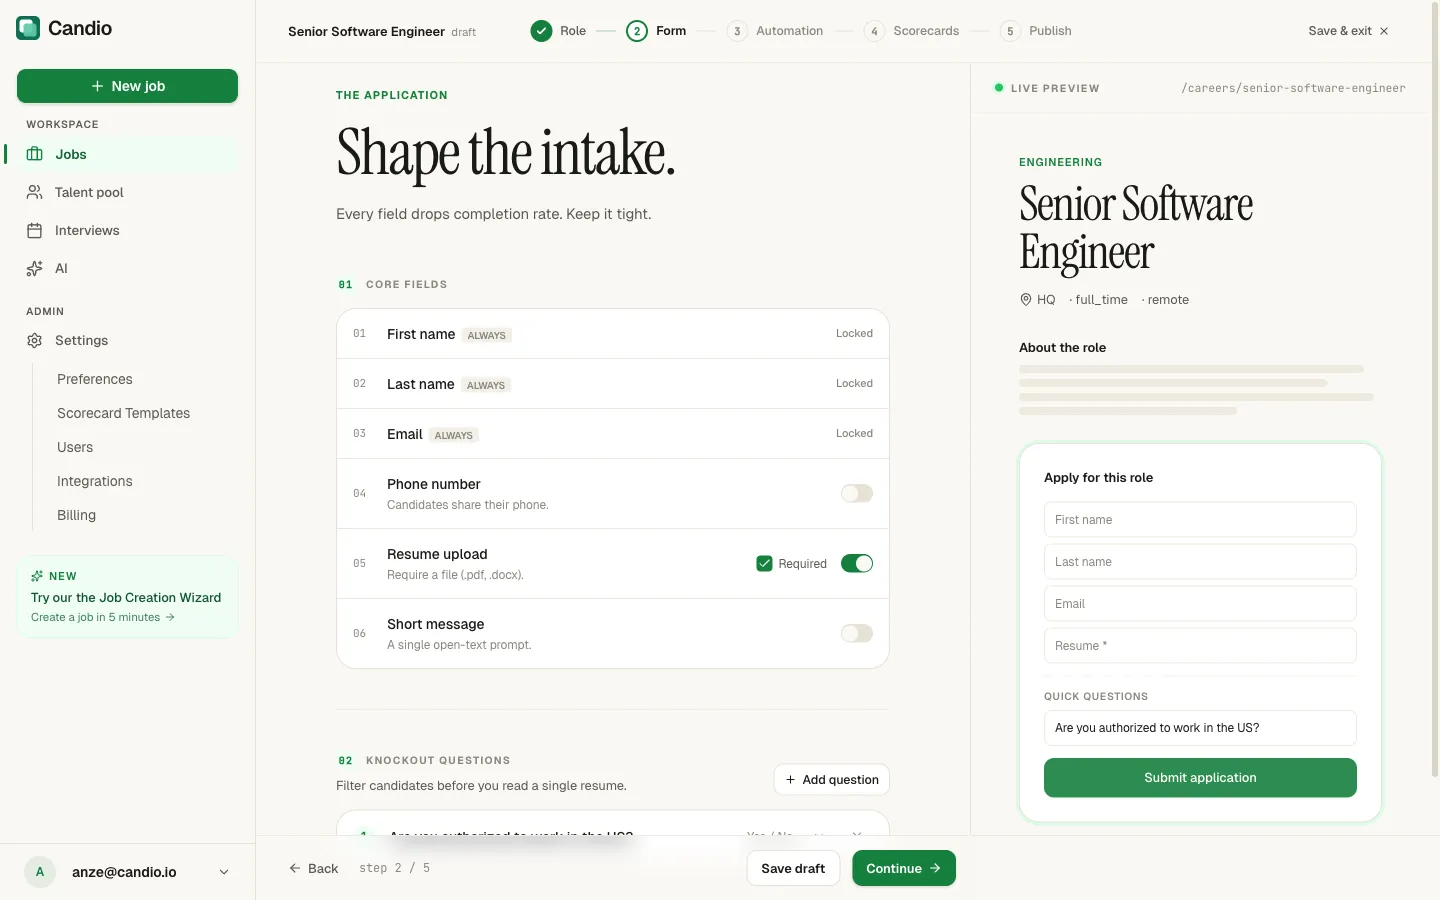
“Shape the intake. Every field drops completion rate. Keep it tight.”
Core fields
Section titled “Core fields”Six predefined fields, from top to bottom:
| Field | Default | Notes |
|---|---|---|
| First name | Locked ON | Always collected. |
| Last name | Locked ON | Always collected. |
| Locked ON | Always collected. | |
| Phone number | Off | Toggle on if recruiters call. |
| Resume upload | On, Required | PDF or DOCX. Toggle Required off for no-resume roles. |
| Short message | Off | A single open-text “why are you interested?” box. |
Knockout questions
Section titled “Knockout questions”“Filter candidates before you read a single resume.”
Click + Add question to add one. Each question has:
- Question text — e.g. “Are you authorized to work in the US?”.
- Answer type — Yes / No, numeric rating, or free text.
- Disqualify rule — pick which answer auto-rejects the applicant. Leave as “No automatic disqualification” to collect the data without acting on it.
When a candidate triggers a disqualify rule, Candio sends your rejection email (if enabled on Step 3) and marks them rejected — they never clog your pipeline.
Step 3 — Automation
Section titled “Step 3 — Automation”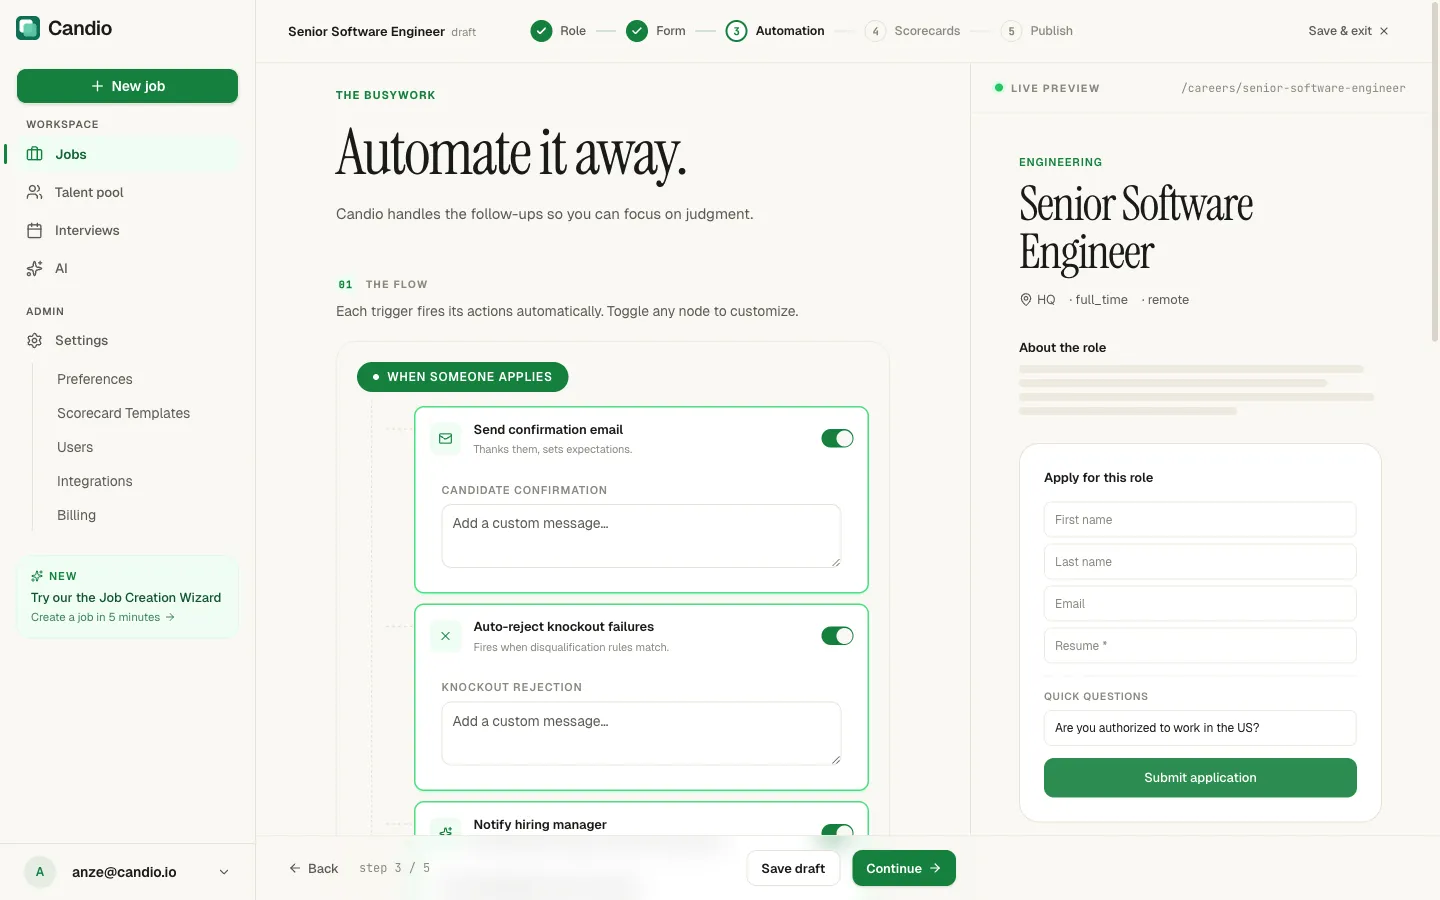
“Automate it away. Candio handles the follow-ups so you can focus on judgment.”
Candio groups automations by trigger. Every toggle is on by default — good hiring has consistent follow-through. Each node has an optional custom message textarea that’s appended to Candio’s baseline copy, so you don’t have to write the whole email.
When someone applies
Section titled “When someone applies”- Send confirmation email — candidate gets a “thanks for applying” email immediately.
- Auto-reject knockout failures — fires only if you defined disqualify rules on Step 2. Sends your rejection template and marks them Rejected.
- Notify hiring manager — the hiring manager (Step 1.04) gets an email for every new applicant.
When you reject
Section titled “When you reject”- Send rejection email — when you click Reject on a candidate in the app, Candio sends this template. Off = silent rejection.
When you make an offer
Section titled “When you make an offer”- Send offer notification — personal email from the hiring manager to the candidate.
When you hire
Section titled “When you hire”- Send welcome email — fires when the candidate is marked
Hired. - Announce to team — internal email to a comma-separated list of Recipient emails (e.g.
team@example.com, ops@example.com) with the new hire’s details.
Defaults for new jobs live under Settings → Job Defaults. Changing a default there affects future jobs only — existing jobs keep their own settings.
Step 4 — Scorecards
Section titled “Step 4 — Scorecards”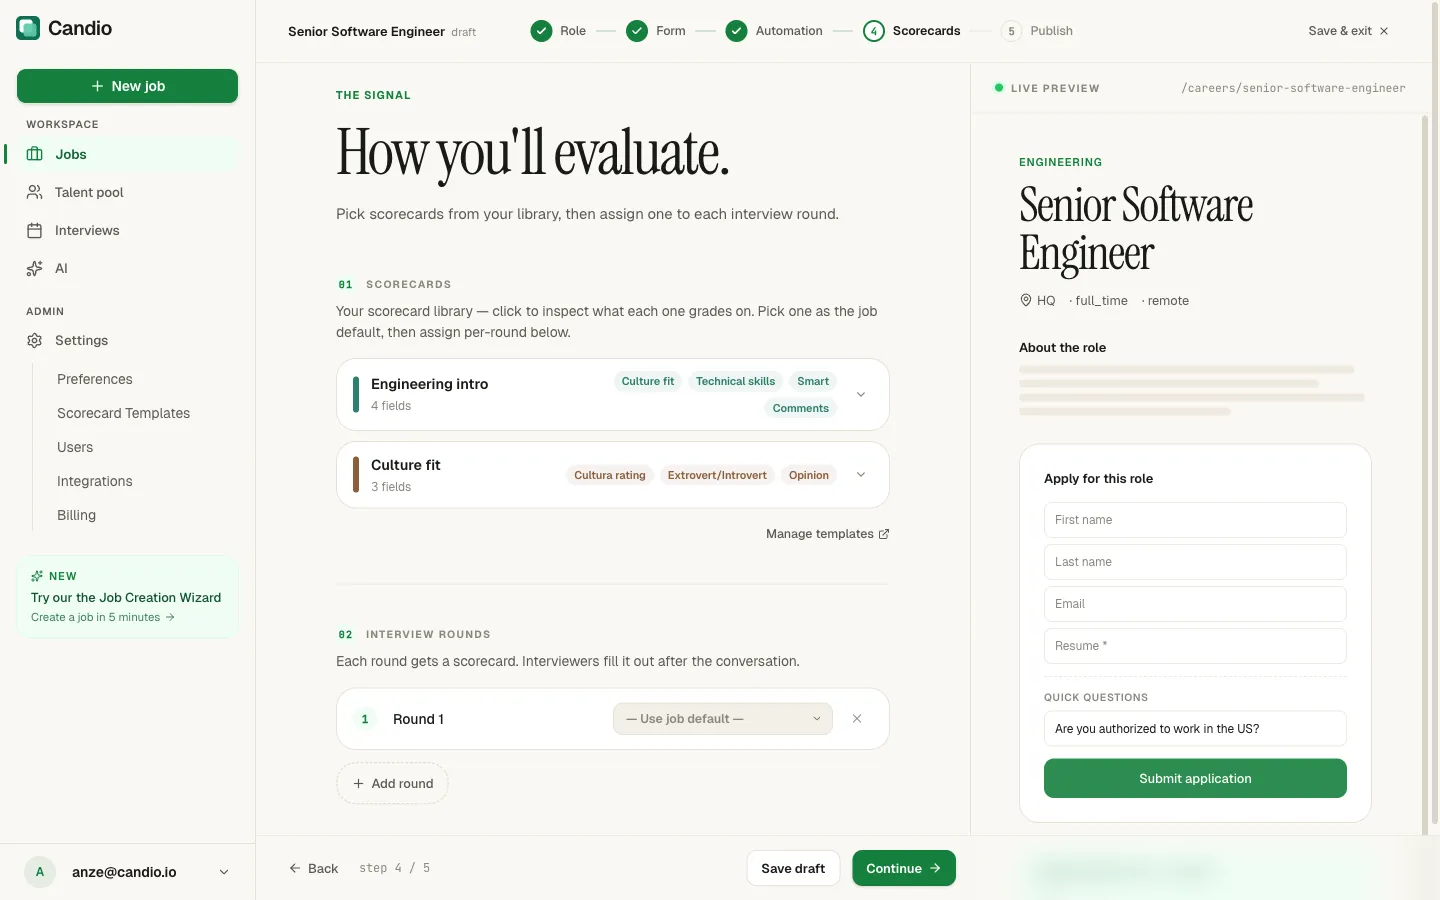
“How you’ll evaluate. Pick scorecards from your library, then assign one to each interview round.”
Two sections:
01 Scorecards (your library)
Section titled “01 Scorecards (your library)”Every scorecard your team has built shows up as a clickable card with its field count and trait chips. Click a card to inspect what it grades on. Pick one as the job default; it’s used whenever a round doesn’t specify its own template.
Click Manage templates (top-right link) to edit the library under Settings → Scorecard Templates.
02 Interview rounds
Section titled “02 Interview rounds”Click + Add round for each round you’ll run — the default label is Round 1, Round 2, …. For each round:
- Rename it (e.g. “Screening”, “Tech Screen”, “Onsite Panel”).
- Pick a scorecard from the dropdown, or leave on
— Use job default —to fall back to the job default. - Remove the round with the ✕ on the right.
You can skip this step entirely and still publish the job. You can always add rounds later from the job’s Scorecards tab, or send an ad-hoc scorecard request for a single candidate without defining a round here.
Step 5 — Publish
Section titled “Step 5 — Publish”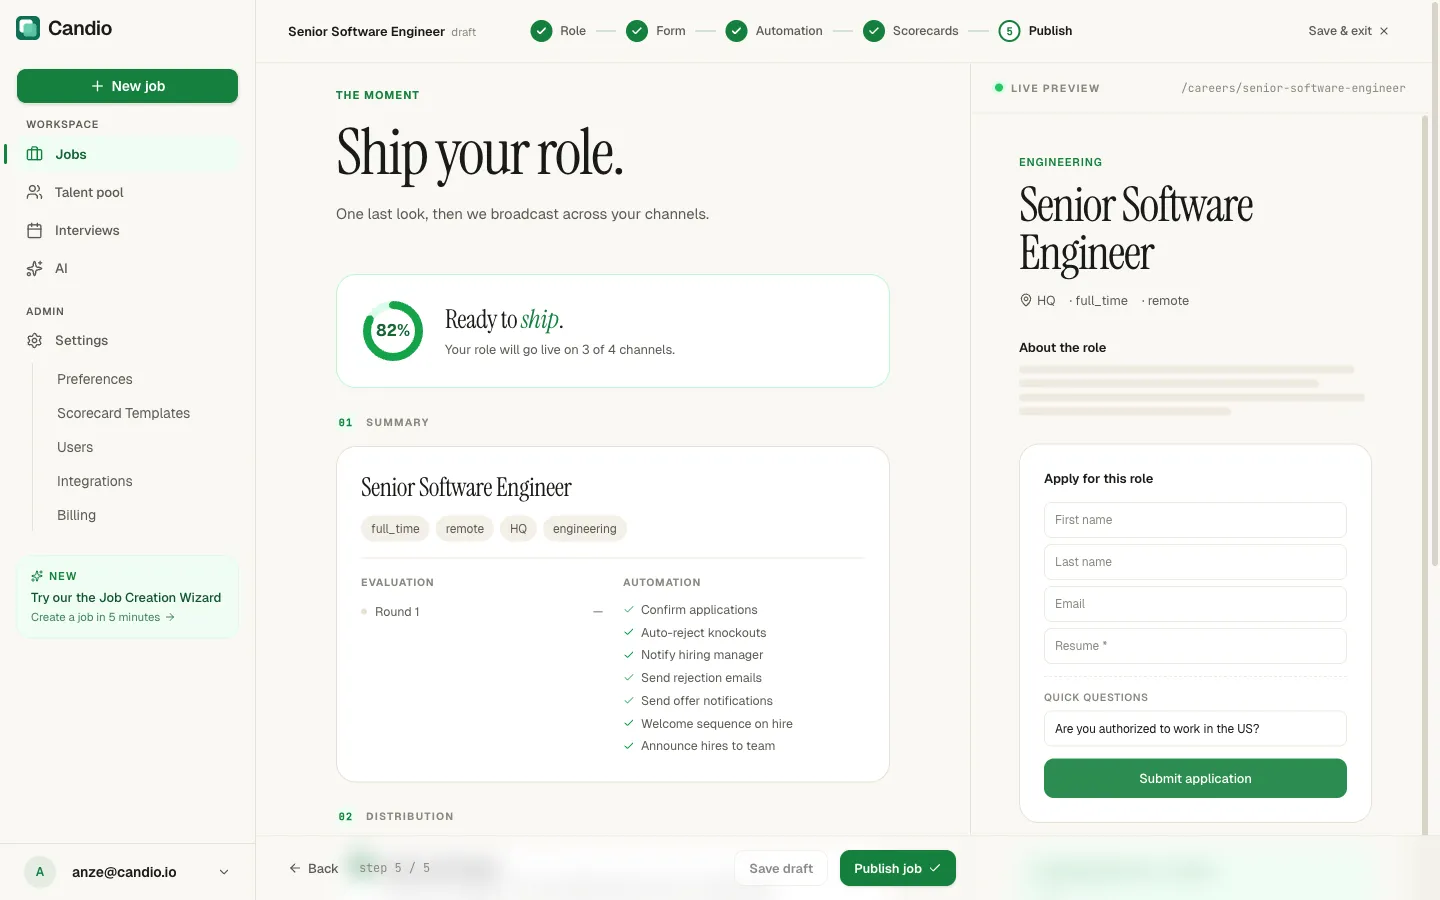
“Ship your role. One last look, then we broadcast across your channels.”
Readiness meter
Section titled “Readiness meter”The big green circle on the left is a readiness meter — the percentage of distribution channels you have connected. At 100% your role goes live on every channel; at partial, the copy reads “Your role will go live on X of Y channels.”
01 Summary
Section titled “01 Summary”- Headline metadata chips (
full_time · remote · HQ · engineering). - Evaluation — your rounds and their scorecards.
- Automation — a green-check rundown of every automation that will fire.
02 Distribution
Section titled “02 Distribution”- Show in job boards toggle. When on, the role is broadcast to:
- Candio careers page — your public
/careers/<slug>page. - Google for Jobs — your role is marked up with JSON-LD structured data automatically; no config needed. Requires fully-filled office location data.
- Indeed — only if you set up an Indeed feed under Settings → Integrations. Shows Not connected · Connect Indeed otherwise.
- HubSpot careers — synced to HubSpot so it shows up in any HubSpot-built marketing site.
- Candio careers page — your public
Turn the toggle off for internal-only or private-link roles.
Publish
Section titled “Publish”Click Publish job (bottom-right). Candio:
- Flips the job to Open.
- Creates/updates the HubSpot form embedded on the careers page and sends a timeline event.
- Turns on every automation you enabled on Step 3.
- Pushes the role to active channels.
You’re returned to the job detail page. You can Edit wizard any time to change anything — existing applicants and their scorecards are unaffected.
Drafts
Section titled “Drafts”If you exit mid-wizard, your job is saved as a Draft and shows up in the Jobs list with a Draft chip. The Dashboard “Needs you today” section surfaces drafts as “Finish setup for N job drafts.” Come back to a draft any time; the Resume wizard button picks up exactly where you left off.