Configure automations
Candio ships seven email automations grouped by four hiring-team actions: applies · rejects · offers · hires. Each is a toggle you control per job, pre-filled from workspace-wide defaults. Where the email is sent automatically, you can append a custom message without rewriting the whole template.
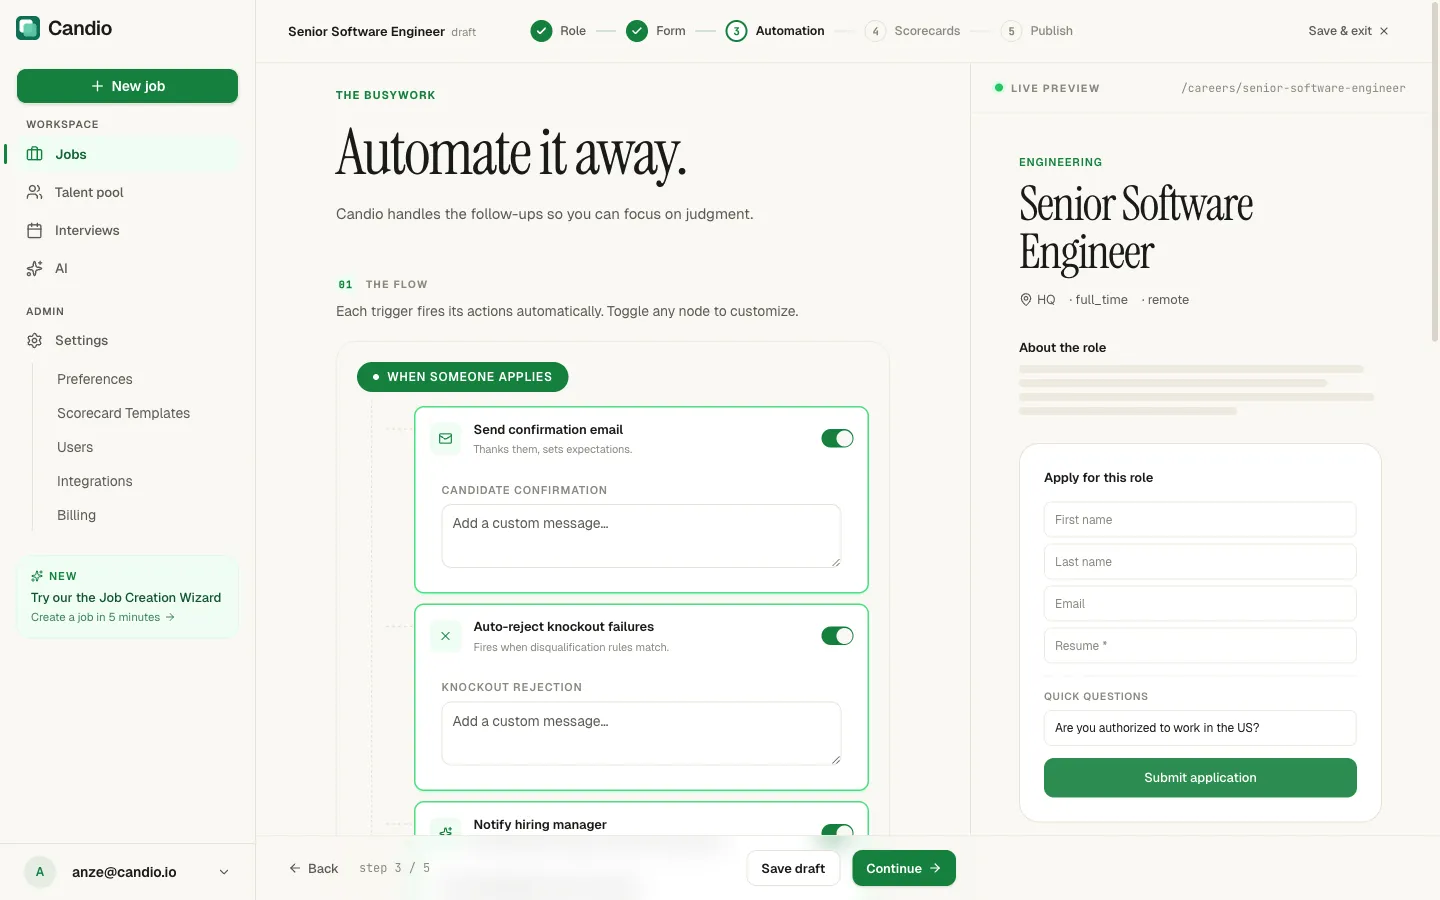
The seven automations
Section titled “The seven automations”When someone applies
Section titled “When someone applies”- Send confirmation email — the candidate gets an immediate “Thanks for applying, here’s what’s next” email. Set expectations and reduce “did you get my application?” inquiries.
- Auto-reject knockout failures — fires only if the candidate tripped a disqualify rule on a knockout question. Sends your rejection template and marks the application Rejected automatically. See knockouts →
- Notify hiring manager — the hiring manager assigned on Step 1 gets an internal email with the applicant’s name and a link to the application in Candio.
When you reject
Section titled “When you reject”- Send rejection email — when you click Reject on a candidate in the app (or their application is moved to Rejected), Candio sends this template. Off means rejections are silent; you reach out manually. On means the candidate hears back the same day.
When you make an offer
Section titled “When you make an offer”- Send offer notification — a personal email from the hiring manager to the candidate letting them know the offer is coming.
When you hire
Section titled “When you hire”- Send welcome email — fires when the candidate is marked Hired. The standard “welcome to the team, expect an onboarding email shortly” message.
- Announce to team — internal email to a comma-separated list in Recipient emails (e.g.
team@example.com, ops@example.com). Typical destinations: your HR team, PeopleOps alias, or a hiring-announcements Slack email.
Where defaults live
Section titled “Where defaults live”Workspace-wide defaults live under Settings → Job Defaults. Every toggle you set there is pre-populated when you create a new job in the wizard. Individual jobs can override any default — your defaults don’t change existing jobs when you update them.
Customizing email copy
Section titled “Customizing email copy”Every automation node in the wizard has an Add a custom message… textarea. Whatever you type there is appended to Candio’s baseline email — you don’t have to rewrite the whole thing.
Examples of good custom copy:
- Confirmation — “We review applications once a week; you’ll hear from us within 10 business days.”
- Rejection — “We had an unusually strong pool this round. We’d welcome you to apply again for future openings.”
- Offer notification — “Let’s book a time to talk through the details — please reply with 3 slots that work for you.”
Candidate-facing sender identity
Section titled “Candidate-facing sender identity”All outbound emails to candidates go out under your workspace’s sender identity — not a generic Candio address. Candidates see your Display name and reply to your Reply-to address.
Configure the sender identity under Settings → Job Defaults → Sender identity:
- Display name — what candidates see in the “From” line (e.g. Acme Hiring).
- Recipients will see
Acme Hiring <no-reply@candio.io>— the friendly name stays, but the@candio.ioreply-to is Candio’s routing infrastructure. Replies come back into your Candio inbox and attach to the application.
Timing
Section titled “Timing”Automations fire immediately on trigger with rare exceptions:
- Confirmation email — within 30 seconds of application submission.
- Hiring manager notification — within 30 seconds.
- Auto-reject — within 30 seconds if the knockout rule matches at submission.
- Manual rejection email / offer / welcome — within 30 seconds of the click.
- Team announcement — within 2 minutes (queued).
If an email doesn’t arrive within 5 minutes, check the candidate’s Activity timeline on their application page for any delivery errors.